Direct Admin
HostBill (Deactivated)Last updated May 14, 2018 by HostBill
Overview
DirectAdmin is an easy to use yet effective web hosting control panel. With the DirectAdmin module for Hostbill you can now provide your customers with the best performance allowing them to manage all vital aspects of their hosting account directly from HostBill client portal: manage Domains, FTP, SSL certificates, setup email accounts, manage databases and much more.
Activating the module
- If the module is included in your HostBill edition you can download it from your client portal.
- If the module is not included in your HostBill edition you can purchase it from our marketplace and then download it from the client area.
- Once you download the module extract it in the main HostBill directory.
- Go to Settings → Modules → Hosting Modules, find and activate Direct Admin module.
Connecting HostBill with Direct Admin
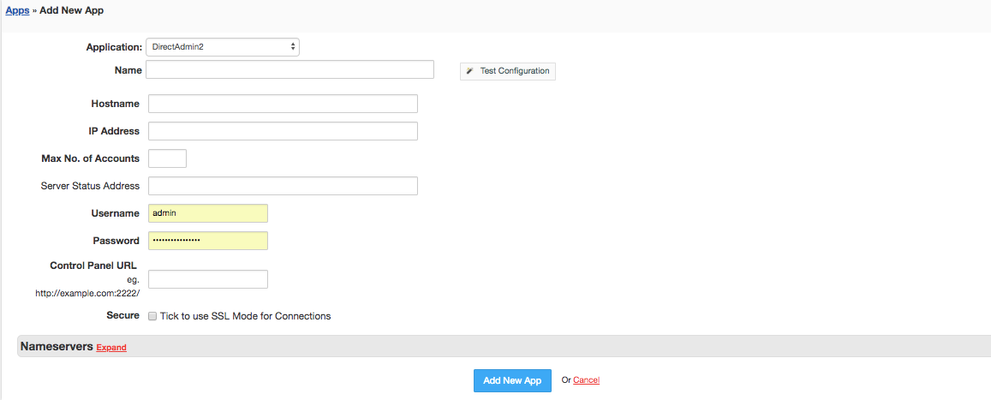
- Proceed to Settings → Apps → Add new App
- From Applications list select Direct Admin
- Enter:
- Name – Name of this connection
- Hostname
- IP Address
- Choose max number of accounts
- Server Status Address
- Username
- Password
- Control Panel URL
4. Verify entered credentials by clicking Test Connection to check if HostBill can connect
5. Save Changes
Adding Direct Admin product
- In HostBill go to Settings → Products & Services, and Add new order page
- From Order Types select Shared Accounts
- Enter your orderpage name, select orderpage template. Save Changes
- Add new product in the new orderpage. Provide product name and setup price and then Save Changes.
- In product configuration section proceed to Connect with App, select Direct Admin and App server created in previous steps.

For more generic product configuration details including price, automation, emails settings refer to Product Configuration article.
Configuring Client Functions
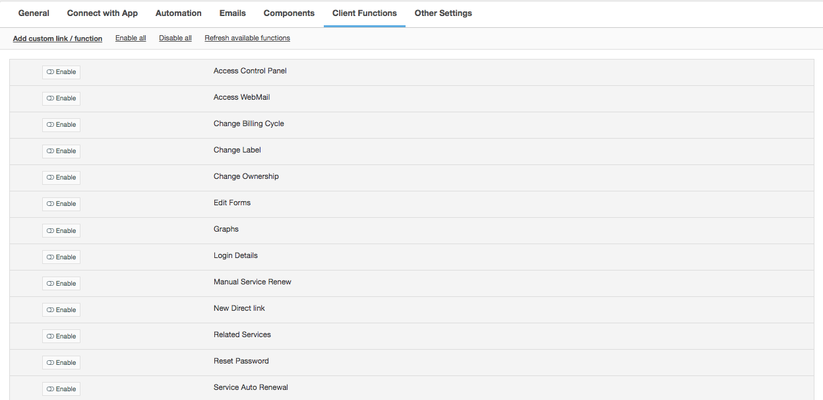
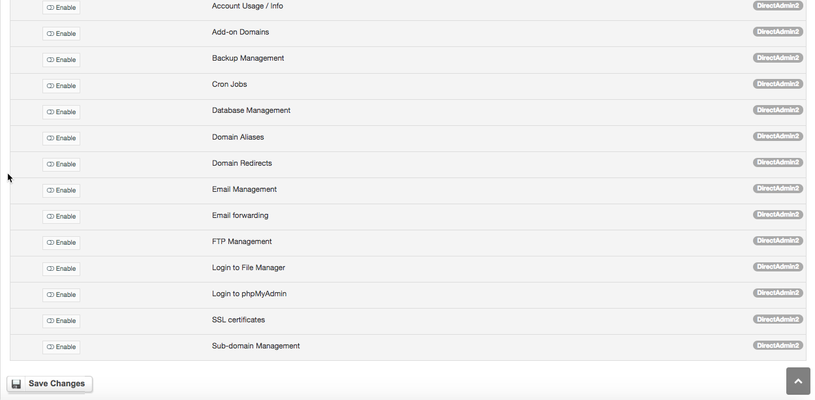
In Products & Services → Your Order Page → Your Product → Client Functions you can control what features customer will have access to in client portal, by clicking Enable/Disable next to the given option.
Use Edit button to adjust function appearance in the client portal.
For Direct Adminyou can enable the following client functions dedicated to this module:
- Access Control Panel
- Access WebMail
- Account Usage/Info
- Add-on Domains
- Backup Management
- Cron Jobs
- Database Management
- Domain Aliases
- Domain Redirects
- Email Management
- Email Forwarding
- FTP Management
- Login to File Manager
- Login to phpMyAdmin
- SSL Certificates
- Sub-domain Management
As well as number of standard client functions, such as
- Change Billing Cycle
- Change Label
- Change Ownership
- Edit Forms
- Graphs
- Login Details
- Manual Service Renew
- New Direct Link
- Related Services
- Service Auto Renewal
Directadmin: Configuring email piping with HostBill
HostBill (Deactivated)Last updated Apr 16, 2018 by HostBill
Add Additional Departments Video Tutorial
Add piping for each address you need
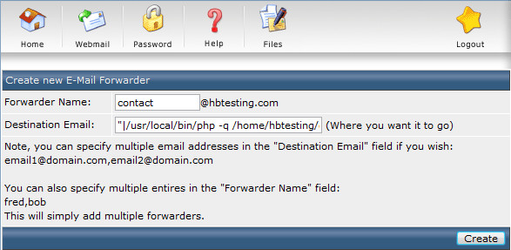
In this step you need to go to Forwarders from Email Management and create new forwarder.
The simplest way is to copy Value from existing pipe and apply to the new one.
If you don’t have any working pipe, you may use standard pattern as destination email:
"|/usr/local/bin/php -q /home/{USERNAME}/domains/{DOMAIN}/public_html/{PATH}/admin/pipe.php" |
Where:
- {USERNAME} is the name of your DirectAdmin account,
- {DOMAIN} is the domain name where you have HostBill installed on,
- {PATH} is your installation directory/path
Imporatnt
Don’t forget about quotes.
Repeat this step for all departments you need.
Add email account for each pipe
Go to Email Accounts from Email Management and create a new one with the same name you used in the first step.
Repeat this step for all created forwarders.

Add departments in HostBill
Once you have created forwarder and email account, it’s the last step to configure the new department.
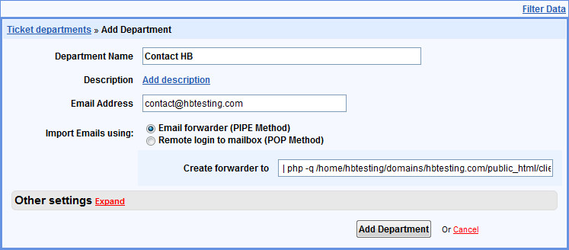
Open Ticket departments from Support menu and click Add new department link.
Provide Department Name and Email Address – and that’s all. After submission your new department should be ready.
