Cacti
HostBill (Deactivated)Last updated May 14, 2018 by HostBill
Overview
Cacti is a complete network graphing solution designed to harness the power of RRDTool’s data storage and graphing functionality. Cacti module for HostBill enables you to measure and bill for bandwidth usage: HostBill automatically collects data from Cacti to bill for total transfer, averages or 95th percentile.
Activating the module
- If the module is included in your HostBill edition you can download it from your client portal.
- If the module is not included in your HostBill edition you can purchase it from our marketplace and then download it from the client area.
- Once you download the module extract it in the main HostBill directory.
- Go to Settings → Modules → Hosting Modules, find and activate Cacti module.
Configuring Cacti
Make sure your Devices in Cacti are configured with “Interface – Traffic” data source.
Create traffic graph (i.e. bits i/o) for each port you wish to monitor through HostBill.
Connecting HostBill with Cacti
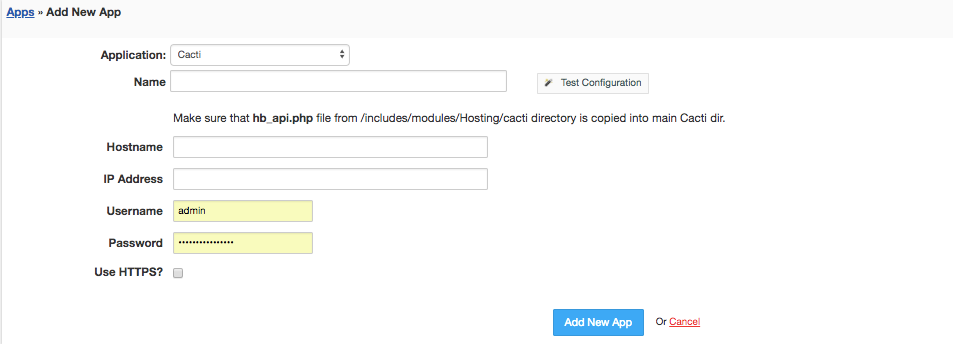
- Make sure that hb_api.php file from includes/modules/Hosting/cacti directory (relative to main HostBill dir, usually /home/hostbill/public_html/) is uploaded into main Cacti dir (one accessible from web/serving Cacti index.php file).
- Once the Cacti module is activated you will be redirected to Settings → Apps to set connection with Cacti
- Enter:
- Name – Name of this connection
- Hostname
- IP Address
- Username
- Password
- Tick if you want to Use HTTPS
- Verify entered credentials by clicking Test Connection to check if HostBill can connect
- Save Changes
Creating your first package with billable bandwidth overages
- In HostBill go to Settings → Products & Services, and Add new order page
- From Order Types select Colocation or Dedicated Servers
- After creating order page add new product in it, provide name and Save changes
- In billing settings choose Bandwidth billing, configure your limits and pricing.
- From Connect with App section select your Cacti module and app.

For more generic product configuration details including price, automation, emails settings refer to Product Configuration article.
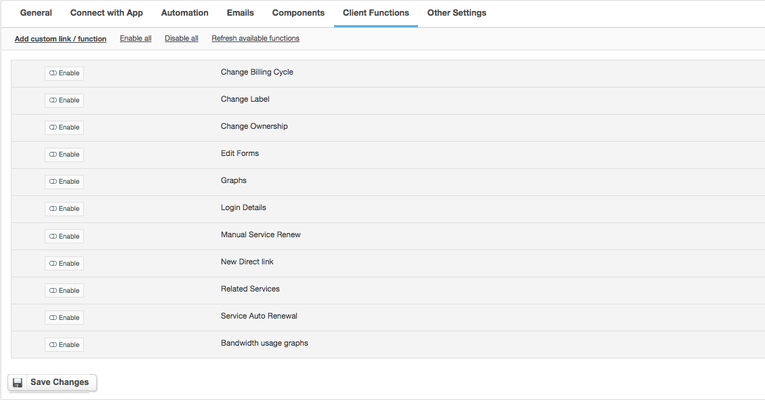
Configuring Client Functions
In Products & Services → Your Order Page → Your Product → Client Functions you can control what features customer will have access to in client portal, by clicking Enable/Disable next to the given option.
Use Edit button to adjust function appearance in the client portal.
For Cacti you can enable a number of standard client functions:
- Change Billing Cycle
- Change Label
- Change Ownership
- Edit Forms
- Graphs
- Login Details
- Manual Service Renew
- New Direct Link
- Related Services
- Service Auto Renewal
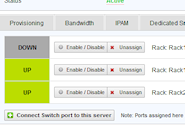
Connecting port from Cacti in HostBill
- In HostBill adminarea go to Account with package configured with Cacti module
- Proceed to “Bandwidth” tab
- Click on “Select switch/ports to connect”
- Select switch and port fetched from Cacti to monitor, make sure it has graph generated in Cacti