Did you know that you can quickly configure your Let’s Encrypt certificates to automatically renew themselves by executing a simple letsencrypt auto-renew script?
Configuring auto-renew for you Let’s Encrypt SSL certificates means your website will always have a valid SSL certificate.
In this beginner tutorial you will learn how to configure your Let’s Encrypt SSL certificates to automatically renew themselves prior to their expiration date.
Before getting started with this tutorial, you should have already configured Let’s Encrypt SSL certificates for an Apache server on Google Cloud compute engine.
If you haven’t yet configured your SSL for your website, here is the tutorial for the Click-to-deploy (standard Apache) and Bitnami (custom Apache) server configurations.
There are 6 steps in this tutorial:
1. Locate Certbot-Auto Package
For those of you who configured SSL using the Click-to-deploy and Bitnami SSL tutorials, your certbot-auto package was downloaded to your home directory. You can view the the package by simply executing the ls command.

For those of you who downloaded the certbot-auto package to a different directory, it is important to find it. If you cannot find the certbot-auto package, you can re-download the package by executing the following command:
wget https://dl.eff.org/certbot-auto && chmod a+x certbot-auto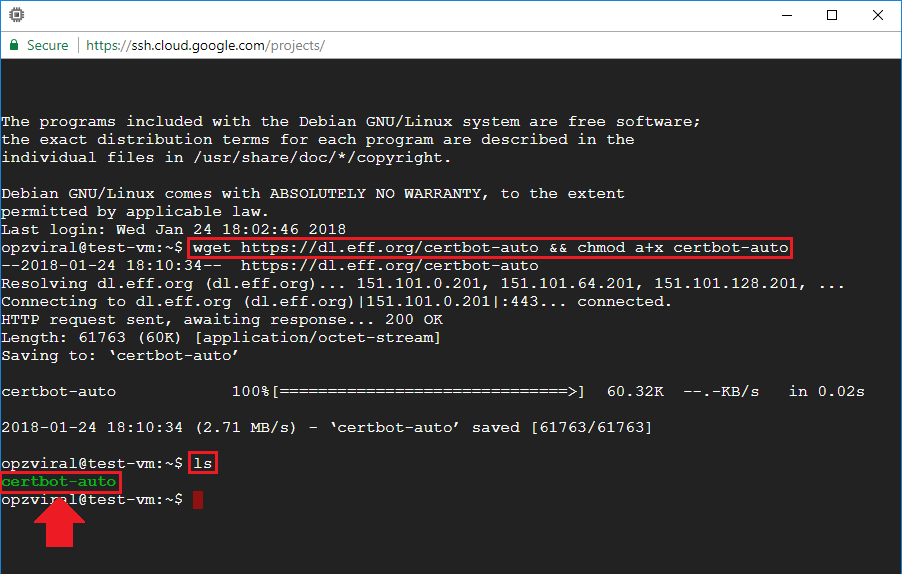
2. Move Certbot-Auto Package
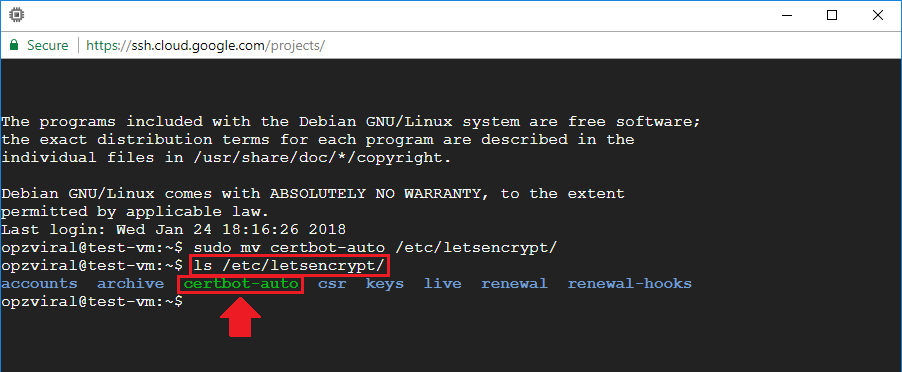
After you’ve established the location of your Cerbot-Auto package, the next step is to move the certbot-auto package into the /etc/letsencrypt/ directory.
So, for users who followed either of the above mentioned Click-to-deploy or Bitnami tutorials, your command would be:
sudo mv certbot-auto /etc/letsencrypt/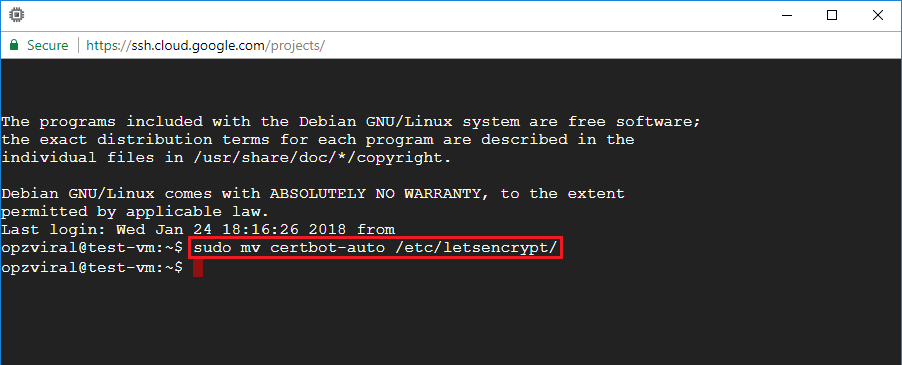
3. Edit Crontab File
Now that you’ve moved your certbot-Auto package to the /etc/letsencrypt/ directory, the next step is to open your crontab file.
To open your crontab file, execute the following command:
sudo crontab -e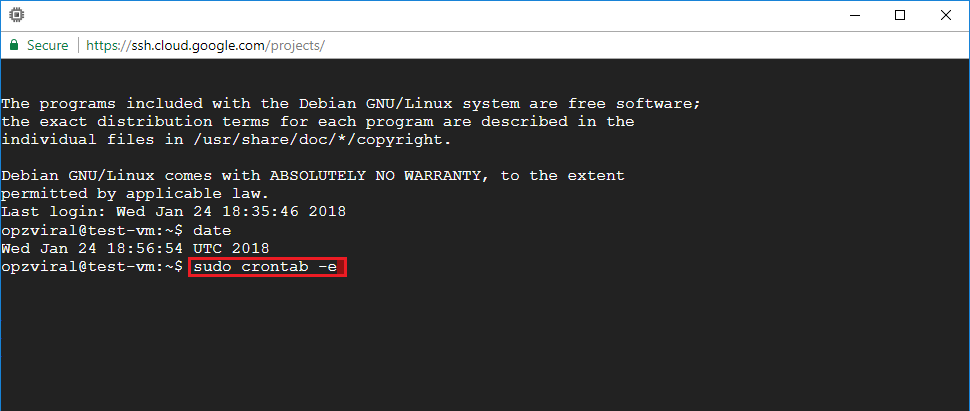
4. Configure Auto-Renew Script
Now that you’ve opened your crontab file, the next step is to add a script at the bottom of the crontab file which will execute once per week and will automatically renew the SSL certificates if they are about to expire.
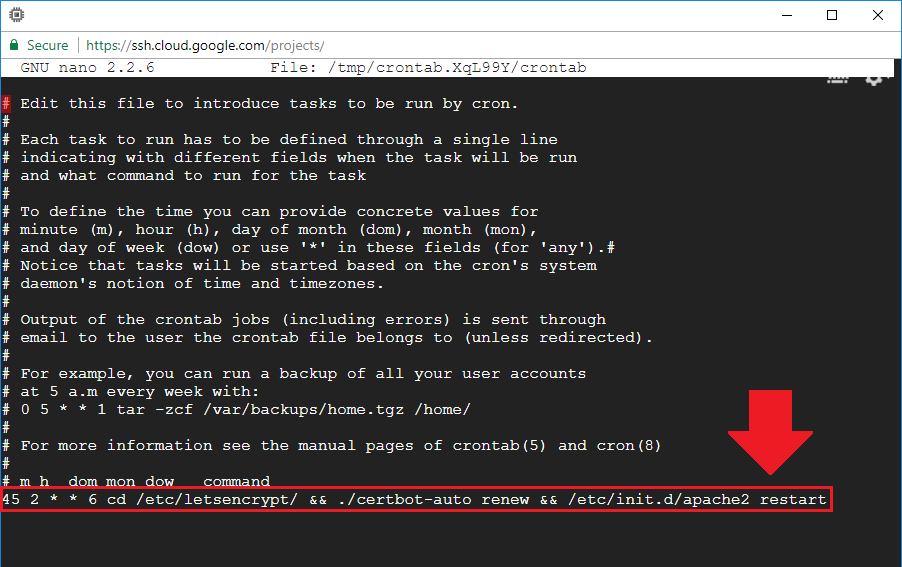
For Click-to-deploy or standard Apache users, add the following script:
45 2 * * 6 cd /etc/letsencrypt/ && ./certbot-auto renew && /etc/init.d/apache2 restart
For Bitnami users, add the following script:
45 2 * * 6 cd /etc/letsencrypt/ && ./certbot-auto renew && /opt/bitnami/ctlscript.sh restart
5. Basic Auto-Renew Testing
To test your auto-renew script for errors, you can quickly perform a ‘dry run’ – a process in which the auto-renew script will be executed without actually renewing the certificates. To perform a ‘dry run’, execute the following two commands:
For Click-to-deploy or standard Apache users:
sudo -i

cd /etc/letsencrypt/ && ./certbot-auto renew --dry-run && /etc/init.d/apache2 restart
For Bitnami users:
sudo -i

cd /etc/letsencrypt/ && ./certbot-auto renew --dry-run && /opt/bitnami/ctlscript.sh restart
Congratulations! You’ve successfully configured your Let’s Encrypt SSL certificates to automatically renew prior to expiration.
If you would like to test-run the renewal process, continue to the next step (optional). Because the script will renew the certificates one month prior to expiration, you can use a SSL Checker to verify whether the certificates have renewed successfully.
Advanced Testing (Optional)
6. Test Certbot Auto-Renewal
In this advanced testing section of the tutorial you will learn how to use the –force-renew command to simulate certificate renewal in a live environment.
To get started, check the current date and time stamp on your virtual machine. To do this, execute the date command.
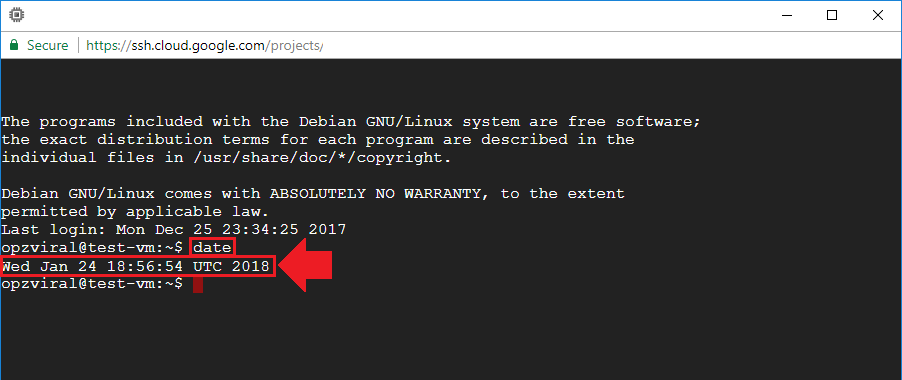
Take note of the date and time – either paste it into Notepad or write it down on a piece of paper. Based on the example above, I would write down 18:56:54
6.1 Check current expiry date
Now that you’ve logged your system’s current date and time, the next step is to check when your certificate is currently set to expire. To do that, execute the following commmand:
openssl x509 -noout -dates -in /etc/letsencrypt/live/example.com/cert.pemNote: Make sure to replace example.com with your own domain name.
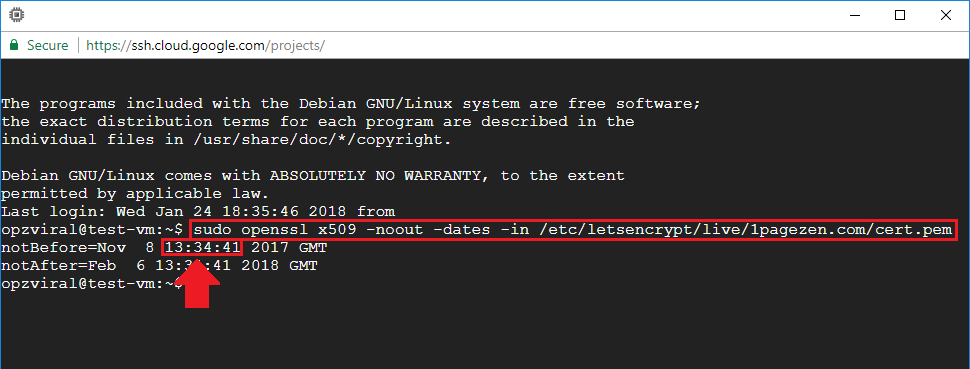
Take note of the date and time when the certificate was issued – either paste it into notepad or write it down on a piece of paper.
Based on the example above, I would write down 13:34:41
6.2 Force Crontab script
Execute the command sudo crontab -e to re-open your crontab file.
In this example my virtual machine’s date and time stamp showed 18:56:54. So, I would want the auto-renew script to execute a few minutes ahead of 18:56:54 at 18:59:00.
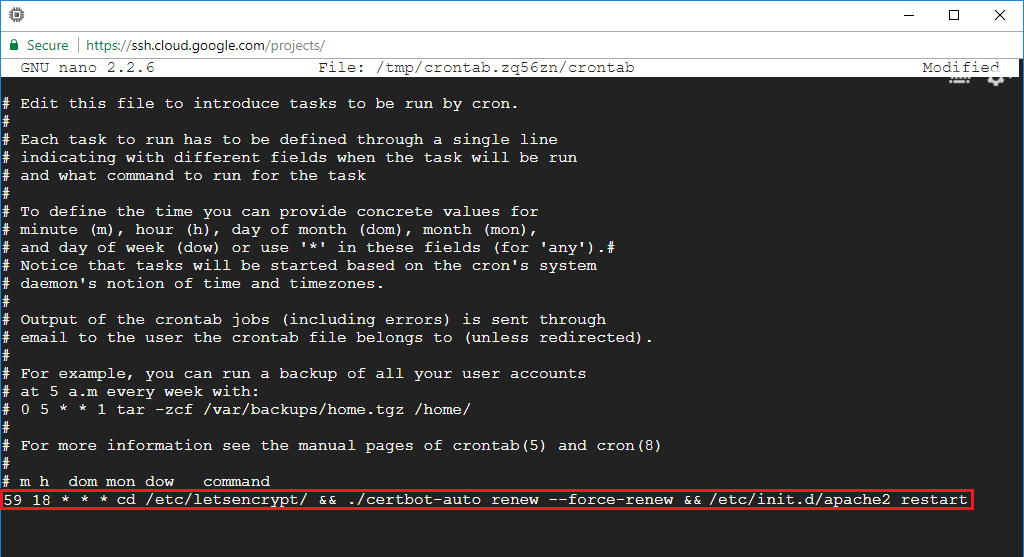
For Click-to-deploy or standard Apache users:
59 18 * * * cd /etc/letsencrypt/ && ./certbot-auto renew --force-renew && /etc/init.d/apache2 restartFor Bitnami users:
59 18 * * * cd /etc/letsencrypt/ && ./certbot-auto renew --force-renew && /opt/bitnami/ctlscript.sh restartAfter the time at the front of the script has passed (18:59 in this example), check your system log to verify that the script has executed successfully.
To check your system log, navigate to your log directory by executing cd /var/log/.

Next, print your system log to your screen by executing the command cat syslog.

6.3 Check if renewal was successful
To check if renewal was successful, navigate back to your home directory by executing cd, then execute the following command, making sure to replace example.com with your own domain name.
openssl x509 -noout -dates -in /etc/letsencrypt/live/example.com/cert.pem
It is also a good idea to double-check with an online SSL certificate checker to make sure your renewed certificates are being recognized.
6.4 Revert crontab script to default
Now that testing is complete, remember to change your crontab script back to the default from step 4 of this tutorial!

That’s it!
Now that you’ve configured auto-renewal for your Let’s Encrypt SSL certificates, you will never need to worry about renewing them again!
If you have any questions or comments about this tutorial, please post them below.
Thanks,